
Updated February 2023
This post contains affiliate links, if you click one of them we may receive a small commission at no cost to you. For more information please read our disclaimer on affiliate links.
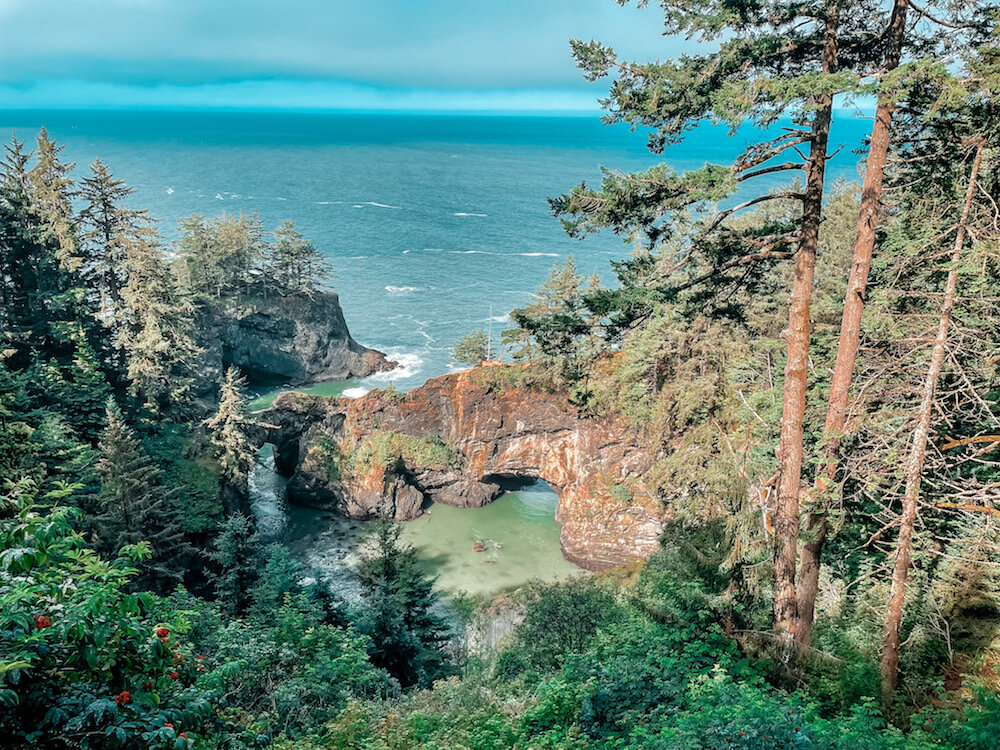
The Pacific Coast bike route is one of the most beautiful bike routes on Earth! People travel from all over the world to bicycle tour the Pacific Coast Highway. In this complete guide to the Pacific Coast bike route I’ll share everything you need to know to start planning your Pacific Coast bicycle tour today!
What is the Pacific Coast Bike Route (PCBR)?
The PCBR is a cycling route that follows the entire West coast of the United States from Canada to Mexico. Most of the route takes you down the world famous Pacific Coast Highway, although the bike route does have several detours through beautiful forests, towns, and quiet roads.
The PCBR begins at the US/Canada border in Vancouver, and runs to the US/Mexico border in San Diego. The entire route covers around 1800 miles!
Do you need to be an athlete to cycle the pacific coast?
One little known fact about the PCBR is that it is an AWESOME route for beginner cycle tourists (like me)! In fact, Tom and I didn’t pull our bicycles out of storage until just two weeks before our trip (I recommend getting your butt in the saddle at least a month before your cycle tour, but I’m proof that you can cut it closer).
We were able to get away with this because it is really easy to take it as fast or as slow as you want on the PCBR thanks to easily accessible cyclist-friendly camping and lodging, TONS of food options, and plenty of well-maintained bike lanes/bike paths throughout the route.
This route is absolutely doable for newbie bicycle tourists!
 >
>Tom and I are not cyclists. We enjoy bike riding, and we do it occasionally, but that’s the extent of our cycling experience. We have done two cycle tours down sections of the PCBR (our first was in 2016), but besides that our bikes mostly sit in storage.
With that said, the PCBR has a LOT of hills (big hills, small hills, steep hills, ALL the hills), so if you don’t prepare much for the ride you should expect your first week to be challenging.
Pacific Coast Bike Route Camping

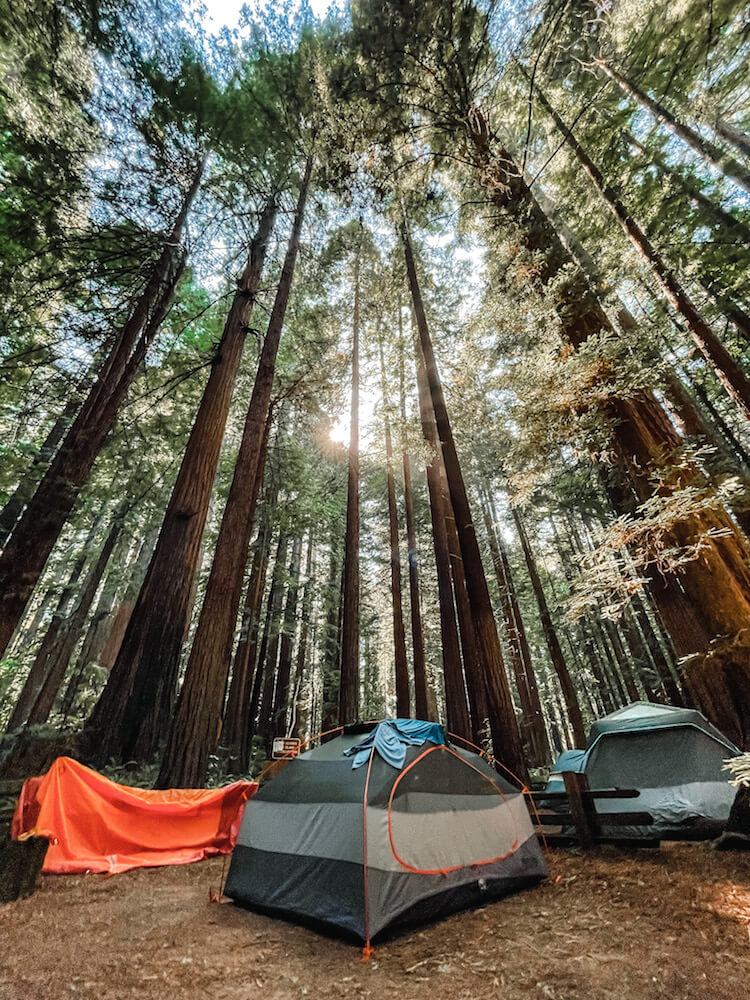
I highly recommend camping along the PCBR! Washington, Oregon, and California (especially Oregon) have made camping SO easy for bicycle tourists.
All three states have “hiker/biker” campsites at many of their state parks. These cyclist-friendly sites are available for $5-$10 per person, and no reservation is needed. If you show up on your bicycle they will not turn you away!

The campgrounds along the PCH are very popular, and many of them are fully booked for car camping 6 months in advance! Cycling (or hiking) the Pacific Coast is the only way to experience these beautiful campgrounds without reservations!
Many of the hiker/biker sites feature lockers, charging stations, and bicycle repair stations. Most of them will allow you to stay up to 3 nights, so you can take rest days and enjoy the parks.
We chose to view our PCBR tour as a slow vacation along the coast. We took our time, and fully enjoyed the awesome campgrounds.
Other Lodging Options on the Pacific Coast

Motels
There are plenty of motels along the PCBR, and with some advance planning you could certainly plan your entire tour hotel to hotel.
Keep in mind that the Pacific Coast is a HUGE tourist destination, so it may be difficult (or impossible) to get a last minute room.
We stopped at motels a few times on our trip, but we always booked a few days in advance. This was especially true for the time we traveled (June/July 2021), because summer is the most popular season on the coast.
Hotels
There are plenty of hotels along the PCBR, and, again, with advance planning you could certainly travel hotel to hotel for your tour.
With this option you should expect to spend around $300/night for lodging.
Warm Showers
Warm Showers is an app that connects cyclists with people who can host cycle tourists in their home (or yard) for free. Most hosts are cyclists themselves, and this is a really cool way to connect with local cyclists along the route.
However, there are not a lot of warm showers hosts on the PCBR compared to the number of cycle tourists riding it. This simply means you should not plan to rely on warm showers.
We utilized it once on our first PCBR cycle tour, and had an amazing experience with a lovely host who we are still friends with 5 years later!
Check out my powerful masterclass “How to Leap (without frying your nervous system)“. In this class I share my exact process for deciding to leap into travel, AND how I supported my nerves through the leap so I could create the beautiful life I now live! (Just click the photo above to access the class!)
What to eat on the Pacific Coast Bike Route

One of the BEST parts of the PCBR is the easy access to TONS of good food! Fresh seafood, farm to table cafes, craft beer breweries, and a wide variety of restaurants are the norm along this route.
Once you get into California you will also travel through San Francisco and Los Angeles, two major culinary destinations! Below we’ve included a few of the food stops that really stood out for us.
Food Recommendations on the PCBR
Tacos La Providencia (Tillamook, OR)
We actually did not eat here, but we heard many cyclists talking about these amazing, authentic street tacos. Unfortunately they were closed when we rode by!
Nevor Shellfish Farm (near Cape Lookout State Park, OR)
This is a little stand on the side of the road where you can get super fresh oysters (and a few other seafood items). You’ll bike right by this on your way to Cape Lookout State Park.
Pelican Brewing (Pacific City, OR)
This is a brewery and restaurant serving delicious craft beers alongside perfectly fried fish and chips! It’s a popular spot, but you can have a beer on the patio while you wait to be seated.
Rogue Brewery (Newport, OR)
Another awesome craft brewery and restaurant, the food at Rogue is delicious, and they have a huge variety of beers to choose from. You can also take a brewery tour here!
Clawson’s Wheel House (Florence, OR)
You’ll bike right by this Southern-style diner on your way to Honeyman State Park in Florence, and I highly recommend you stop! We had breakfast here, and it was SO delicious with huge portions (bike tourist heaven). The biscuits alone make it worth a stop.
Barnacle Bistro (Gold Beach, CA)
The burgers and french fries here were mind-blowingly good. Seriously, one of the best burgers I’ve ever had. Definitely stop in here when you go through Gold Beach, you’ll bike right by it!
Paul’s Famous Smoked Salmon (Klamath, CA)
This little smoked salmon stand on the side of the highway is not to be missed. Perfectly smoked salmon that basically melts in your mouth!
No Name Burger Stand (Ferndale, CA)
This tiny burger hut was just what we needed after a long, cold day of cycling into Ferndale. They have amazing burgers, fries, and milkshakes! This stand is in the middle of a ranching community, and the beef is locally sourced.
Peg’s Place (Standish hickey, CA)
This might be our favorite restaurant on the entire PCBR. Peg’s Place is just across the street from the Standish Hickey State Recreation Area which has an awesome hiker/biker campsite.
Peg’s Place features organic, locally sourced ingredients, and craft beer on tap. Alongside the burgers and sandwiches you can also get super fresh grilled oysters!
Peg’s Place also has a convenience store where they serve espresso drinks, made-to-order deli sandwiches, and a variety of camping supplies and basic groceries.
Cowlick’s Ice Cream (Ft Bragg, CA)
We had ice cream here twice it was so good! Made in house ice cream, with some really special flavors that constantly change.
Thai Vegan Santa Monica
This one is a bit of a cheat, because we didn’t actually cycle through Santa Monica. However, this is just off the PCBR and it used to be my go-to for Thai food when I lived in Santa Monica!
This little Thai food stand makes absolutely delicious Thai food, and if you’re not vegan, no worries, you won’t be able to tell it’s vegan anyway!
Groceries on the Pacific Coast Bike Route
There are lots and lots of grocery stores along the PCBR. You will have no trouble finding groceries so you can cook your own food.
We usually ate one meal out per day and then cooked the rest of our meals, but you could easily cook all your meals if you wanted. Below we’ve shared our favorite bike camping meals!
Favorite Bike Touring Camp Meals

Corn beef hash and hard boiled eggs
This is straight up protein, fat, and calories, and it makes an awesome meal after a long day on the bikes. We usually get a 6 pack of eggs and hard boil all 6. Hard boiled eggs keep for 24-36 hours without refrigeration once boiled so they make an awesome snack on the road.
Refried bean tacos
Tortillas are easy to pack in your panniers, and can be used for all sorts of things! For these tacos we would use a can of refried black beans, Fritos, avocado, cheddar cheese (a block can last 2 days without refrigeration), and hot sauce. Combine it all in tortillas for tacos!
Avocado and hard boiled egg wraps
This is an easy and delicious breakfast if you’ve already hard boiled some eggs! The two spices we carried were a small salt shaker and a small bottle of garlic powder, and those are both good with these wraps.
Honey and peanut butter rollups for quick sugar boost
Peanut butter and honey rolled up in a tortilla is surprisingly awesome when you’ve just biked 20 miles!
Mac n cheese with pouched salmon
Be sure to get the mac and cheese where you just add cheese sauce (no milk or butter required). This is another protein and fat heavy meal, but the fat in salmon is significantly healthier than the corned beef.
Granola and powdered milk
Our go-to breakfast, you just add water to the powdered milk. Try to get a brand of powdered milk that is whole milk (not skim or lowfat). Our favorite brand is a Mexican product called Nido, and can be found in the Mexican products section of many grocery stores.
Ramen with an egg and veggies
Ramen is basically useless on its own because there are so few nutrients, but if you add in an egg and some broccoli, carrots, and kale you have a filling, nutritious meal!
Powdered bone broth
This was one of our FAVORITE snacks! All you have to do is heat water and add the powdered bone broth, and you can sip it right out of a mug. There’s tons of protein in this, and the flavor is amazing. We drank this before bed instead of tea or hot cocoa.
We were only able to find this in the Ray’s Groceries in Oregon and Northern California, so if you pass by a Ray’s stock up on this. It’s located by the bouillon cubes in the soup aisle.
Chocolate covered espresso beans
We grabbed these whenever we saw them. A couple of these will give you a quick boost of energy when you need it!
Pacific Coast Bike Route Map
Since the PCBR is an Adventure Cycling route, the best maps for the PCBR are the ones sold by Adventure Cycling. These maps show elevation change, distance between stopping points, campgrounds, bike shops, and they give bits of advice for specific route sections as well.
Also, these maps will route you off the highway in areas where the shoulder disappears or traffic is notoriously bad, OR if there’s a scenic spot you definitely don’t want to miss!
For the Oregon section you can get a free Oregon Coast Bike route map here.
Pacific Coast Bike Route Gear

Bikes
The most important piece of gear is, of course, going to be your bicycle! I highly recommend a touring bicycle for the PCBR.
Tom rides a Surly Disc Trucker, and that is the bike I would recommend if you want the best, most comfortable touring bike. It is quite expensive, but well worth the money.
I ride an REI brand touring bicycle, the Novara Safari, and I have been really, really happy with it. Unfortunately, REI no longer makes the Novara line of bicycles, so you can only find them used. Rather than recommend a bike I’m unfamiliar with, I encourage you to try a variety of touring bicycles in order to find one that fits your needs!
If new touring bikes are giving you sticker shock consider finding a used touring bike on Craigslist or Ebay.
Another trick, if you are an REI member, is to wait for the big annual sale so you can use your 20% off coupon on a touring bike! This is what I did when I bought my Safari, and it saved me hundreds of dollars!
NOTE: If you are not yet an REI member I would highly recommend joining before you begin gearing up for your bicycle tour. You will get 10% of your purchases back as a dividend at the end of the year, and the sales/discounts you’ll have access to as a member are well worth it!
Panniers
You’re going to need panniers (saddlebags) for your tour! It is worth spending the money to get good panniers. There’s nothing worse than having a pivotal piece of gear fail in the middle of nowhere!
I used Timbuk2 saddlebag panniers, and I really like them. I originally purchased these because they have a dedicated laptop compartment, and on our first tour I traveled with my computer. They’re also really affordable, and a great value.

Nowadays I leave the computer home, but I still love these panniers! They’re easy to put on and take off my bike, they’re easy to tie things to, and they’ve traveled over 1500 miles with me without issue. They came with a rain cover, but they are only water resistant, not waterproof.
If you are planning to cycle the PCBR in any season other than summer you may want to invest in pricier, waterproof panniers. Ortlieb makes the best waterproof panniers. Tom uses these, and they are pretty awesome.
You will likely need four panniers per bike, two in the rear and two in the front. Be sure that you pack heavier items in the back, otherwise your ability to steer will be affected.
Packing Cubes
These are a must for organizing your clothes in your panniers. I use these Gonex compression cubes, and I love them!
I’ve used these cubes to pack my backpack for Southeast Asia, for hiking trips, and for bicycle touring. You could even use these in a regular suitcase to keep things organized, so they’re a super useful purchase!
Handlebar bags
Your handlebar bag will become your best friend on your bicycle tour. It will be the one bag you can reach into while you ride, and it will be the bag you grab to take into restaurants and shops with you.
You want a handlebar bag that can be quickly and easily released, and that can be accessed while riding. You also don’t want a handlebar bag that is too big or heavy!
I use this Topeak compact handlebar bag, and I LOVE it! It’s well designed, attaches to the bike securely, and has a quick release feature.
Visibility Vests

These are absolutely essential on the PCBR. You want to be as visible as possible so that distracted tourists notice you on the road!
We wore these runner’s safety vests, and they were awesome. They’re super lightweight and mesh so you don’t even notice you’re wearing them!
Flashing lights
Again, this is a must-have piece of safety equipment so that driver’s notice you on the road!
We each mounted one of these Planet Bike red flashing lights on the back of our bike, and we carried extra batteries.
Cooking Set
You’re going to want a compact and lightweight cooking set if you plan to cook meals for yourself. Even if you plan to eat out most of the time I recommend at least carrying a stove, fuel, and a pot for boiling water.
We use an MSR pocket rocket stove, and a GSI cooking set. This set is seriously durable. We’ve used it on camping trips, backpacking trips, and both of our bike tours, and it’s held up beautifully!
Sleeping Pad
Good sleep is essential on a bicycle tour, and you will definitely want a good sleeping pad.
I use the Thermarest Prolite Plus women’s sleeping pad, and I highly recommend it. It packs down small, provides great padding and insulation, and is (mostly) self-inflating.
Tom uses an REI brand sleeping pad that is a bit softer than mine, and he plans on switching to a Thermarest for our next camping trip.
Sleeping Bag
I tested out a new sleeping bag on this bike tour, and I was pleasantly surprised!
This Near Zero down filled bag kept me comfortably warm the whole trip, and it packs down SMALL, like so tiny I was really concerned that it wouldn’t keep me warm enough.
It’s a lot more affordable than other down sleeping bags I looked at, and it held up well the whole trip so I’m happy to share this one with you!
Pillow
After our last tour I knew I wanted an inflatable pillow, but I couldn’t bring myself to pay the high price tag for the name brand (it’s just a little pillow)!
So I decided to take a risk and try a knockoff brand that had great reviews. To my surprise (and relief) this pillow ended up being AWESOME. It’s easy to inflate and deflate, holds air without any leaking, and packs down super tiny.
I used this Tekology inflatable pillow every single night on our tour, and I’m going to bring it camping from now on!
Tent
Since our tent is no longer being produces (it’s a Marmot Limelight 3p) we can’t recommend a specific tent.
Be sure to buy a good quality, lightweight tent. This means you should look for 3 season backpacking tents. You don’t want to carry extra weight, and tents can get heavy!
You want something that is easy to put up and take down, and with a vestibule to put your panniers in while you sleep.
Merino Wool Clothes
Merino wool is our new favorite material for outdoor clothes. Tom and I are already huge fans of Darn Tough Socks, which are merino wool and amazingly comfortable, so we decided to try merino wool clothing on this bicycle tour.
(Also, Darn Tough socks have a lifetime warranty, and they really honor it, I’ve actually received a new free pair from them after having worn a hole in one of my socks)!
We both bought merino wool t-shirts and underwear to test out, and were blown away by how comfortable, odorless, and dry they stayed! No matter how much we sweat our merino wool clothes remained dry and comfortable.
Seriously, I can’t recommend these highly enough. They’re pricey, but so worth it for any kind of outdoor activity.
Icebreaker brand makes high quality merino wool shirts!
U-lock and Mount
You’ll want a good, solid bike lock on the PCBR. While we never felt unsafe on this route, there are areas where petty theft is a problem, and you won’t want to leave your bike unlocked.
We love Kryptonite locks, they’re heavy duty and easy to use. This U-lock will keep your bike safe, and if you want an easy way to carry it you can mount it onto your bike!
Pacific Coast Bike Route Packing List

- Tent
- Down sleeping bag
- Sleeping pad
- Inflatable pillow
- Lightweight plastic mug
- Backpacking spoon lightweight
- Folding Knife
- Pasta strainer lightweight
- Stove Fuel
- Backpacking stove
- Small spatula
- Titanium spork
- Lighter
- Dish Sponge
- Pot
- Backpacking bowl
- Backpacking cutting board
- Life straw
- Plastic water bladders
- Kitchen Towel
- 1 trash bag
- Backpacking skillet
- Rain coat
- Puffy down coat
- Packing cubes
- Safety vest for visibility
- Thermal layer top/bottom
- Sleeveless synthetic top
- Merino wool t-shirt x 2
- Merino wool socks x 3 (Darn Tough brand)
- Merino wool underwear x 4
- Buff for hair
- Bike shorts
- Leggings
- Hiking pants
- Quick dry towel
- Swim suit
- Compressible backpack
- D-lock
- OTC med kit
- Emergen-C electrolyte/vitamin mix
- Toiletries
- Padlock
- Dr Bronners soap
- Hat/visor
- Lightweight sandals
- Spare tube
- Tube patch kit
- Bike tool
Click here to get a free, printable packing checklist for the Pacific Coast Bike Route!
If you’d like more information about the items we packed, and why we chose them check out our Youtube PCBR packing video here!
Traffic on the Pacific Coast Bike Route (and how to avoid it!)

The only major downside to the PCBR is the traffic. Since Highway 101 (the Pacific Coast Highway) is so popular, you will definitely encounter traffic on your ride.
If you go in the summer (when the weather is the nicest) you will encounter heavy traffic.
Like most people, we don’t enjoy cycling next to heavy traffic so we figured out a way to avoid it as much as possible on our tour!
The trick was to wake up before the sun came up (about 5am), and get on the road just after sunrise. This meant we arrived at our next campsite in the early afternoon, which is when traffic starts to really pick up.
This may sound hard, but actually, once we got in the routine, early morning was the most beautiful time of the trip. We got to see the gorgeous sunrise every morning, and in those early hours we saw SO much cool wildlife!

We saw sea otters, sea lions, seals, eagles, deer, elk, it was amazing! Plus we had the road all to ourselves for the first few hours, when we could enjoy the scenery of the coast without much noise.
An important safety tip is to be sure you are VERY visible on the road! We wore neon yellow safety vests while we rode, and we used red flasher lights.
For more information on traffic on the PCBR check out our Youtube video all about avoiding traffic!
How much does it cost to cycle the Pacific Coast bike route?

The cost of bicycle touring the Pacific Coast varies widely person to person. It depends on how long your trip takes, whether you decide to camp, and what you decide to eat.
I’ve shared four budgets below: Shoestring, Intermediate,High End, Luxury. These are per person daily budget estimates. We definitely fell in the Intermediate category with our budget.
Shoestring Budget
Hiker/Biker site: $8
Food: $15
Misc: $2
TOTAL: $25/day
Intermediate Budget
Hiker/Biker site: $8
Food: $35
Misc: $7
TOTAL: $50/day
High End Budget
Motel: $100 (can be shared by two people to reduce cost)
Food: $40
Misc: $10
TOTAL: $150/day
Luxury Budget
Hotel: $300
Food: $100
Misc: $50
TOTAL: $450
Our spending averaged out to around $100/day for the two of us ($50 per person), and that included 4 nights in motel rooms along the way. That did not include transportation to and from the PCBR.
How to get to the Pacific Coast Bike Route?
There are many ways to get to the PCBR depending on where you’re coming from. If you’re in the region I highly recommend using Amtrak! They will allow you to reserve a spot for your bike on the train, and you won’t have to take your bike apart, it will go in the baggage car.

Amtrak has connecting buses that service many of the points where you may want to start your tour, and those buses can be booked right along with your train ticket. Be sure to reserve a spot for your bike on the bus as well (it will go under the bus in the luggage area).
If you live out of the Western region of the USA then it’s easiest to fly to either Seattle or Portland. You will have to take your bike apart and box it for the airplane. Seattle and Portland are both very bike friendly cities, and both airports have bike tool stands in the airport where you can reassemble your bike!
Amtrak connects at both Portland and Seattle so you can take the train/a bus to your starting spot, OR you can just cycle to the PCBR from the airport. Many people do this.
We live in Oregon, so on our first tour in 2016 we bicycled to the PCBR from our home city of Eugene. On our most recent tour in 2021 we took the Amtrak train, and a connecting bus to Astoria, Oregon so we could start at the Northern Oregon border.
We had an awesome experience with the Amtrak bicycle service. They were very helpful, and let us stow our panniers with our bikes (don’t count on this! You may need to carry all of your panniers onto the train with you, so prepare accordingly).

Bicycle touring the PCBR is an awesome travel adventure! If you have any questions about this route feel free to shoot me a message through the contact page or leave a comment below. If you’d like to see photos and videos from our PCBR bicycle tour be sure to follow us on Instagram and Youtube!
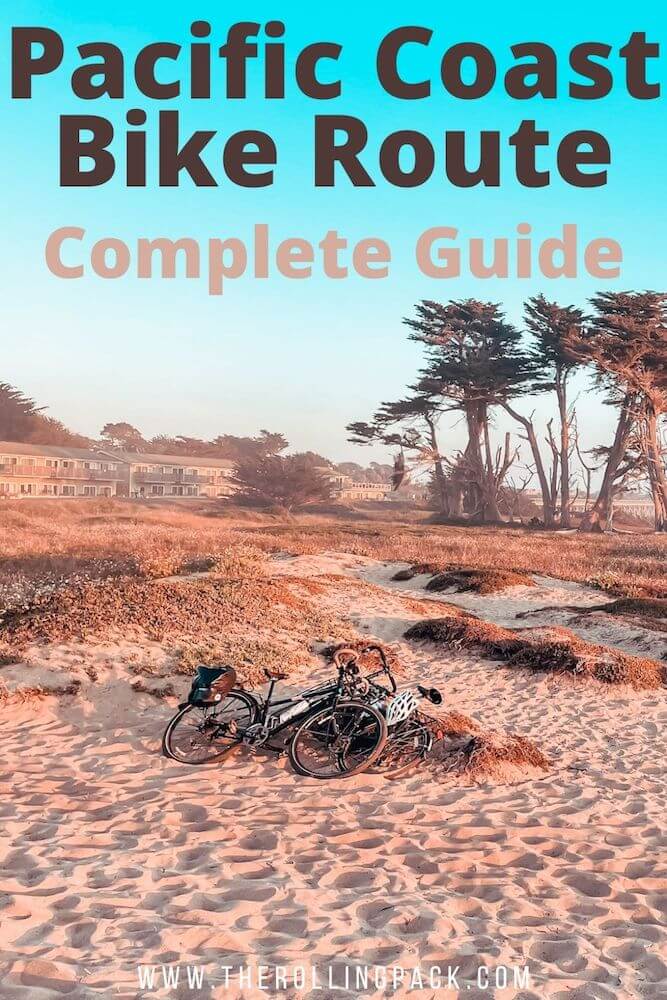
Did you enjoy this post? Pin it to Pinterest!
What a fantastic resource! Im hoping to tackle the ride in September 2022 so thanks for all the valuable info. Just curious; how long did you take to compete it? I’ve read a blog where a dude rode from Vancouver to Tijuana in 29 days. Another couple, who took in many of the sights along the way, completed it in 42 days. Still trying to give myself a rough time frame.
Thanks again for the info!
Thank you for your reply Brittany. And I was mistaken about the 29 days – the bloggist didn’t include his rest days, so it was 29 riding days plus another 10+ or so for rest. Anyway, 40 to 50 sounds like a reasonable amount of time to enjoy the experience.
Cheers!